
I still remember the first time I had to install a new smart lock, hahaha, Gzzz, and trust me, it didn’t go as planned. Not even close.
It was this weird mix of excitement and nerves. I can still picture that day.
The box was sitting right in front of me.
I opened everything up, laid out all the parts, and gave the instruction manual a quick glance. Then I jumped on YouTube, hoping to find a video that would make things a bit easier.
If you’ve ever tried to install a smart lock yourself, you already know it’s not always as smooth as the tutorials make it look.
Honestly, I’ve got to admit — it wasn’t a great experience. Some influencers made it look like child’s play.
So I decided to give it a shot on my own.
Fifteen minutes, tops. Unscrew the old, screw in the new. Done.
And that’s when it starts.
That nagging little voice in the back of your head, the one that loves to whisper doubts right when you’re about to start a project:
‘Yeah, but what if my door is ancient?’
‘What if the holes don’t line up? Like, at all?’
‘What if I screw this up so badly that I can’t even lock my door tonight?’
I get it. Man, do I get it.
I’ve felt that exact same cocktail of excitement and low-key panic.
The honest truth? For a lot of people, it really is that simple. But what about the rest of us (or at least, for me)?
The ones with houses that have… character.
This isn’t another guide that lives in a fantasy land of perfect, brand-new doors.
This is a guide for the real world.
Before you even think about picking up a screwdriver, let’s run through a quick, 5-minute reality check. It’ll give you the confidence to know if you can tackle this yourself, or if it’s time to call in the pros.
So if you’re here with me reading this post, dude — believe me — this is just my own story of trial and error.
Kinda funny, I agree, but it might actually save you some time and help you enjoy the journey.
Come along!
Other cool articles I made for you:
1. Best Smart Locks of 2026 — Tested for Reliability, Security & Real-Life Use
2. Schlage vs Yale (2026): Which Legacy Lock Brand Makes the Best Smart Lock?
3. The Best Smart Locks That Work with Apple HomeKit & Home Key (An Honest, No-BS Guide)
4. Are Smart Locks Safe? A Realistic Look at Hacking, Break-Ins, and Your Real-Life Security.
As an Amazon Associate, I earn from qualifying purchases. When you buy through my links, I may earn a commission — at no extra cost to you.
The 5-Minute Reality Check: Easy Job or Weekend Project?
Trust me on this one: five minutes of prep right now will save you an entire Saturday of screaming at a door. Grab a tape measure, pull out your phone to snap a few pictures, and let’s figure out which category your door falls into: the “easy job” or the “weekend project.”
Check #1: The Biggest Gotcha – Deadbolt or Mortise Lock?
This is the number one reason people return their locks. It’s the biggest gotcha of them all.
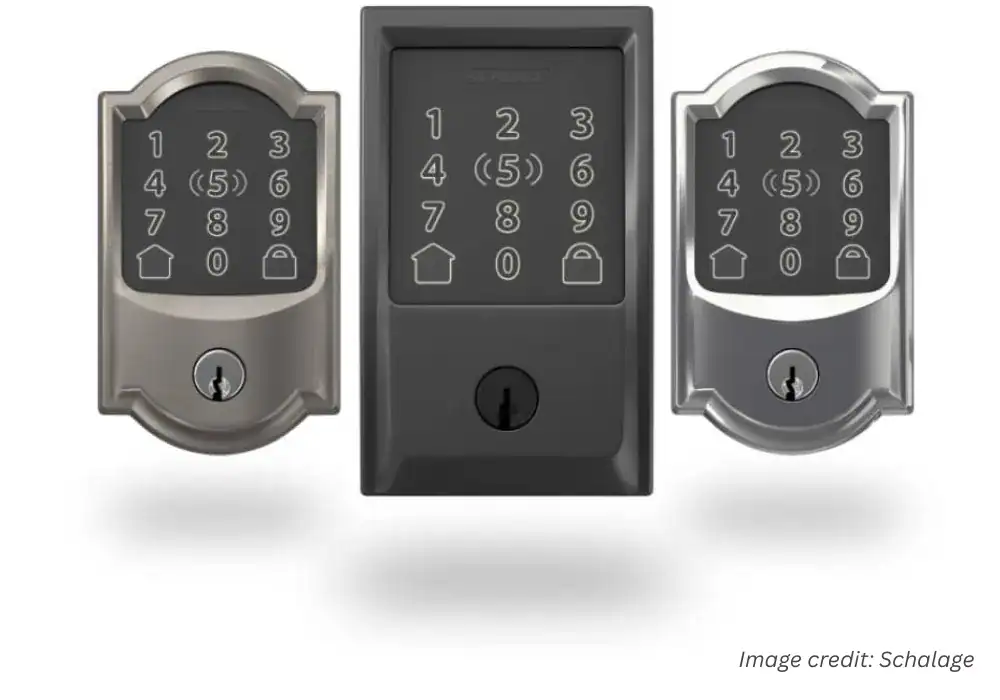
Almost every smart lock you see advertised (Schlage, Yale, Wyze, etc.) is designed for a door with a standard deadbolt.
This means you have a two-hole system: one larger, round hole for the lock itself, and a smaller one below it for the handle or knob.

Now, take a good look at your door.
If you see a single, long, rectangular metal plate embedded in the side of the door that combines the handle and the lock into one giant unit, you, my friend, have a mortise lock.

If you have a mortise lock, stop right there.
Most standard smart locks will not fit without major surgery on your door.
But don’t panic!
We’ve got a killer solution for you in the troubleshooting section below.
Check #2: The Three Measurements That Matter
If you confirmed you have a standard deadbolt, congratulations! You’re already ahead of 70% of frustrated DIYers right now.
Now, let’s grab that tape measure.
These three numbers are the only ones that matter for compatibility:
| Measurement | What It Is | Standard (The “Easy” Range) |
|---|---|---|
| Door Thickness | How thick your actual door is. | 1-3/8″ to 2″ thick (3.5cm to 5cm) |
| Bore Hole Diameter | The width of the main lock hole. | 2-1/8″ (about 5.4cm) |
| Backset | The distance from the center of the lock hole to the edge of the door. | 2-3/8″ or 2-3/4″ (6cm or 7cm) |
Table Summary: A simple comparison of the three key door measurements needed for smart lock compatibility, including door thickness, bore hole diameter and backset — the critical factors that determine whether a smart lock will fit correctly.

If your numbers match these ranges, you’re in great shape — most modern smart locks are designed to fit these exact dimensions.
These measurements aren’t random — they follow the BHMA (Builder’s Hardware Manufacturers Association) standards that most U.S. door hardware manufacturers use.
Link: ANSI/BHMA Standarts
If everything checks out, congrats — your install just got a lot easier. Let’s move on to the fun part.
The Step-by-Step Visual Guide: How to Install a Smart Lock (The “Ideal World” Scenario)
If your door passed the reality check above, congratulations! Your installation is going to be incredibly smooth—just like those YouTube videos promised.
The goal here isn’t to reinvent the wheel; it’s to give you a quick, confidence-boosting reference.
For demonstration and educational purposes, I’ll be using the installation process of a Schlage smart lock as an example.
Note: All product images and videos used for illustration belong to Schlage. Used for educational purposes only. Special thanks to Schlage for creating such clear, high-quality installation resources — you guys make this process a breeze.

The steps are similar across most major brands, but Schlage’s design makes it especially clear and beginner-friendly.
Most of the top-tier locks I’ve researched have an incredibly straightforward process, which is a huge part of why I recommend them.
If you want to see which models are consistently rated as the easiest to install, check out my complete guide to the best smart locks of 2026.
Here’s the quick rundown of the process:
Step 1: Remove the Old Lock
Let’s kick things off by removing the old lock — it’s simpler than it looks.
Use a screwdriver to loosen the two mounting screws on the interior thumbturn plate,
then gently separate both halves of the lock.
Remove the latch from the door edge to fully clear the opening for your new smart lock.

Step 2: Install the New Deadbolt
Now that your door is prepped, position the new deadbolt assembly and slide the bolt into the side of the door.
Make sure it fits snugly inside the latch opening and aligns perfectly with the strike plate area.
Use a screwdriver to tighten the screws and secure the bolt in place — this ensures smooth operation once the lock is fully assembled.
Watch how it’s done below:

Step 3: Mount the Exterior Keypad
This is where things start to look smart — literally.
Position the Schlage keypad on the exterior side of the door, feeding the cable through the bore hole.
Make sure it sits flush and level before tightening any screws.

Step 4a: Connect the Interior Assembly
Now it’s time to secure the interior assembly.
Connect the cable from the keypad, double-checking that it’s properly seated.
Tighten the mounting screws — but don’t overdo it.
Too much pressure can damage the lock’s internal mechanism.

Step 4b: Install the Batteries
Almost there — time to power it up.
Insert the batteries into the compartment, following the polarity marks (+/–).
The lock will power on automatically, and you’ll hear a short beep or see a light flash to confirm.
Watch the process below:
Step 5: Set Up the App
You’ve done the hardware — now let’s make it smart.
Download and open the Schlage Home app on your smartphone.
Follow the on-screen setup to connect your new lock, assign door names, and test connectivity.
Once paired, you’ll see all your locks in one dashboard, with real-time access control and history.

Welcome to the Real World: A Troubleshooting Guide
Okay, now for the important part.
What if your door didn’t pass the checklist? Or
what if you hit a snag right in the middle of Step 4?
Don’t panic.
This is the section that most guides skip, but it’s the one that will save your Saturday.
Let’s solve your problem.
Problem #1: “Help, I Have a Mortise Lock!”
As we saw, this is a total game-changer.
I’ve personally run into this more times than I’d like to admit — especially with older homes where mortise locks are still common.
Think of it like trying to fit a square peg in a round hole — the door itself was never made for modern smart locks.
But you still have two great options:
- Buy a Smart Mortise Lock: Don’t give up on smart tech! Brands like Aqara, Samsung, and a few others make locks designed specifically to replace mortise sets. They’re not as common in the US, but the quality is often excellent.
- Hire a Professional: A good locksmith or carpenter can modify your door to accept a standard deadbolt. This involves filling the old pocket and drilling new holes. It’s a bit of work, but it’s a permanent fix.
Problem #2: “The Bolt is Sticking and Won’t Close Smoothly.”
This is so common it’s almost a rite of passage. Usually, the problem isn’t the lock itself, but the alignment with the door frame.
Think of your deadbolt like a muscle — if it’s misaligned, no amount of strength will fix it.
After testing dozens of installs, I’ve seen this tiny detail cause 80% of “broken lock” complaints.
- The Easy Fix: Sometimes, just tightening the screws on your door’s hinges can pull everything back into perfect alignment.
- The 5-Minute Fix: Grab a metal file or a Dremel tool and slightly enlarge the hole in the strike plate (the metal piece on the door frame) until the bolt moves freely. A tiny adjustment makes a huge difference.
See? Most of the time it’s not the lock — it’s the door.
Problem #3: “Do I Need a Locksmith or a Handyman?”
My research on Reddit forums showed a lot of confusion here.
After helping readers troubleshoot dozens of installs, I’ve noticed this is the point where most people call for help — but often the wrong kind.
Here’s a simple visual guide to help you decide whether to call a handyman or a locksmith for your smart lock installation or repair:
| Task Type | Who to Call | Typical Scenarios |
|---|---|---|
| Woodwork, resizing, alignment | Handyman | Enlarging holes, fixing door alignment, adjusting hinges, general carpentry. |
| Lock mechanism or mortise conversion | Locksmith | Internal lock repairs, deadbolt replacements, or complex door conversions. |
Table Summary: A direct comparison showing when a handyman is the right choice for carpentry and alignment work, and when a locksmith is required for lock mechanisms and advanced door security tasks.
Take a second to appreciate it — you just installed a smart lock yourself. Most people stop at the manual, you actually did it.
You Did It! Now, What’s the Payoff?
Congratulations! Seriously.
Whether you tackled the whole thing yourself or you knew exactly what to ask a pro to do, you just won.
You overcame the anxiety, you solved the problems, and now your home is officially smarter, safer, and a whole lot more convenient.
Installation is just the first step. The real payoff is the key-free life.
Now that the hard part is over, it’s time to think about the bigger picture.
One of the biggest decisions in choosing a lock is how seamlessly it fits into your daily routine and how well it works with the rest of your smart home gear.
To understand how two of the biggest names, Schlage and Yale, stack up in terms of their ecosystems and features, read my head-to-head breakdown here.
My final thoughts and Personal Recommendation for you
Installing a smart lock is an empowering feeling. It puts you in total control of your front door.
If you’re still in the choosing process—or if you just finished the install and are looking for a second lock— I can tell you this: the model I recommend most for the majority of people is the Schlage Encode Plus.
Schlage Encode Plus
Top-tier reliability with seamless Apple Home Key integration. Peace of Mind. It "just works” experience with the ultimate physical key backup.
Pros:
- Apple Home Key is a Game-Changer
- Built Like a Tank
- Multiple Backup Plans
- Trusted, Household Name
Cons:
- Premium Price Tag
- Potential Weather Sensitivity
- Requires a Strong Wi-Fi Signal
As an Amazon Associate, I earn from qualifying purchases. When you buy through my links, I may earn a commission — at no extra cost to you.
Why We Picked It
Top-tier reliability with seamless Apple Home Key integration. Peace of Mind. It "just works” experience with the ultimate physical key backup.
Who It's For
Apple users who want a trusted, traditional brand.
Specs & Configuration
Remote Access – Lock or unlock your door from anywhere via the app.;
App Control – Manage users, check activity, and receive alerts from your phone.;
Schedule Codes – Create and manage up to 100 custom entry codes.;
Smart Home Ready – Compatible with major smart home systems.;
Voice Control – Works with supported voice assistants for hands-free use.;
Built-in Alarm – Detects tampering or forced entry attempts.;
Battery Operated (No Hardwiring) – Runs on batteries;
easy to install and maintain.
Table Summary: Pros and cons overview of the Schlage Encode Plus — emphasizing its Apple Home Key integration and trusted build quality.
Why?
Because it’s known for its reliability and its straightforward installation.
It’s the safe bet.
After going through all that troubleshooting, you want a lock that’s going to give you zero trouble.
If you want the peace of mind of an easy install and the best tech on the market, you can check out the Schlage Encode Plus right here:
As an Amazon Associate, I earn from qualifying purchases. When you buy through my links, I may earn a commission — at no extra cost to you.
Next up, I’ll show you how to set custom access codes and automate your Schlage lock with Alexa and Apple Home. You’ll wonder how you lived without it.
FAQ Section — Schlage Encode Plus Installation
How long does it take to install a Schlage Encode Plus?Click to see the answer
For most standard U.S. doors, installation takes about 20–30 minutes — even if it’s your first time.
If your door already fits the BHMA standard prep dimensions, you’ll only need a Phillips screwdriver.
The process is mostly about alignment — not wiring — so it’s quick and clean once you remove the old deadbolt.
Can I install it without drilling new holes?Click to see the answer
Yes — as long as your existing deadbolt holes follow the 2-1/8" borehole and 1" latch hole standard (common on most U.S. doors).
The Schlage Encode Plus is designed for direct replacement installs, meaning no extra drilling or wiring in 90% of homes.
If you have a mortise lock instead of a standard deadbolt, you’ll need an adapter plate or a professional to retrofit the door.
What happens if my Wi-Fi drops?Click to see the answer
No worries — your Schlage Encode Plus will still work offline.
You can always lock and unlock it using the keypad, physical key, or Apple Home Key (via NFC on your iPhone or Apple Watch).
Once the Wi-Fi reconnects, the lock automatically syncs activity and access history in the Schlage Home app.